One of my ongoing projects this year has been restoring an old New Williams Treadle Sewing Machine. I will save the story of how I acquired this old sewing machine for a future Picture Of The Week. This week's picture is actually about 3D printing.
During the restoration of this old sewing machine, I realized that it was missing a part - the presser foot adjustment screw. Finding parts for New Williams sewing machines that were built in the 1850's is not really possible, and I wasn't sure if the screw was a standard size or not, so I decided to try printing my own. Some of you may recall my first experiment with 3D printing last year. I was upset that I lost my source code for that model in a hard disk crash. This time my hard disks survived the process, so I can share my source code for this presser foot screw.
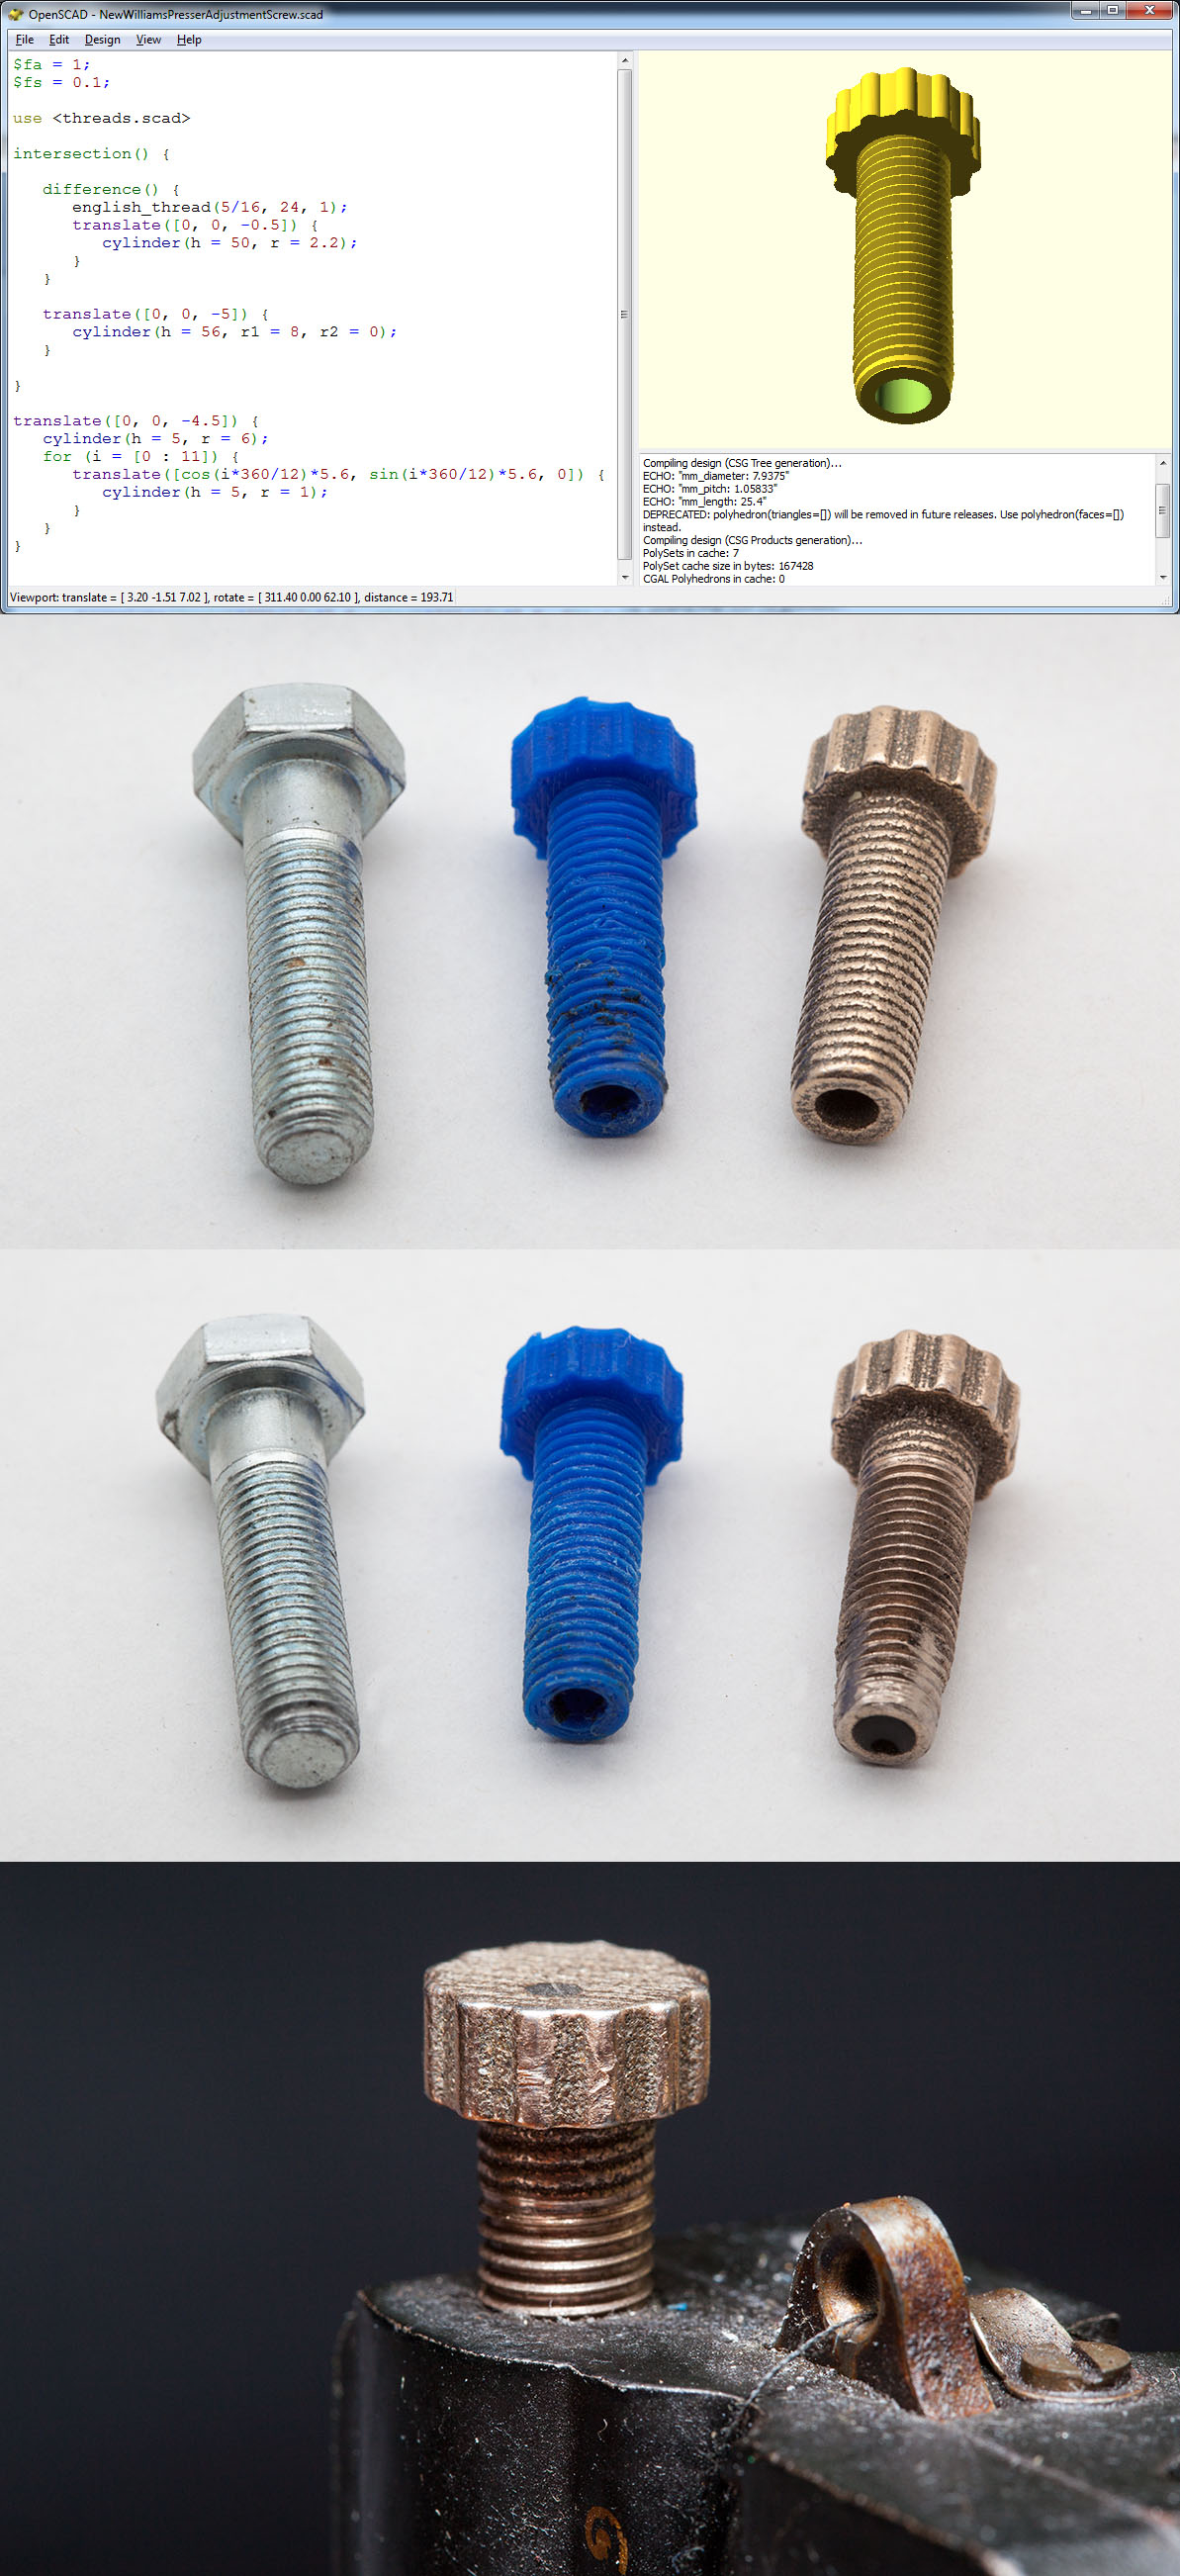
The presser foot screw is basically a screw with a hole in the middle, so that the rod that holds the spring can move up through the screw. First, I found a bolt that seemed to have the correct threading (but obviously no hole in the middle). (The bolt is the one on the left side.) Using that for reference, I wrote a script in OpenSCAD to make a similarly sized bolt that could be hand-tightened. I asked my friend Mike Neame to print a prototype on his MakerGear M2 to make sure I got the dimensions and threading right. (The prototype is the blue plastic one in the middle.)
The prototype turned out OK, even though the hot plastic sagged a little bit around some of the threads. Since it turned out so well, I decided to try Shapeways' Steel printing material. The steel model from Shapeways is on the right. Because the steel has the consistency of "wet sand" during the printing process, the threads didn't really turn out that great. I had to invest in a die to re-cut the threads. In the third photo below, you can see the models after I re-cut the threads. I found the steel material extremely difficult to cut, and I had a lot of trouble getting the die started at the tip, so I wound up mangling the model quite a bit during that process. Luckily, even after my sloppy thread cutting job, it still threads into the sewing machine perfectly!
So, my restoration project is going very well, and I can't wait to update everyone further when the project is done, which will hopefully be in January. Special thanks this week go to Mike for printing the prototype for me, and Norm for lending me his tap and die set, even though it did not contain the strange sized die that I needed. It was handy to have a die holder once I special ordered the die I needed from Home Hardware.
I should note that after all was said and done, I think that the presser foot adjustment screw on New Williams sewing machines is the same as on other similar sewing machines like Singer. In other words, I think I could have just bought a replacement on eBay, but it was fun to 3D print my own, even if it did wind up costing a little more.
Technical Details: These photos were all taken with my 5D Mark II + EF 100mm Macro at ISO 400, f/11, for 1/100th of a second (with Speedlite 430EX set at +2 flash exposure compensation).
Thanks for all the details!  That's really interesting to follow through the
whole process.	I admire your tenacity.  I wondered whether the screw could
have come loose on the trip, and occasionally I find strange parts in my car,
but I would remember if I found a bolt with a hole up the middle.
-- Mum at 6:11am, Sunday December 21, 2014 EST
Hosted by theorem.ca