⇍ June 10th, 2007 ⇏
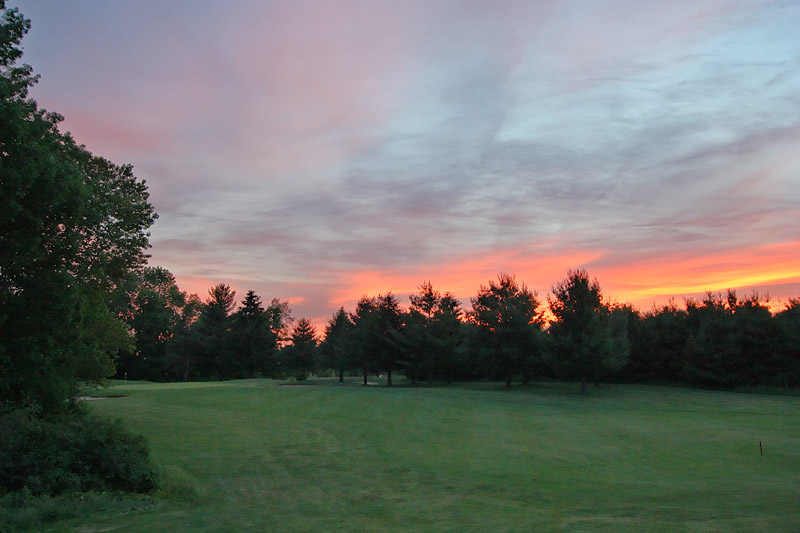
The Inscriber Golf Tournament is coming up in July, so I thought I would dust off the old clubs and see if I could still hit a ball. The weather today was great, so four of us headed out after work to Foxwood Country Club. Towards the end of our day we were treated to a nice sunset, which I tried to quickly capture between shots. (You would think that there would be plenty of time to take pictures while playing golf, but it is a surprisingly busy game, especially if you are the worst player in your group.)
This was another opportunity to test my Photoshop skills. (Those of you who aren't into the technical stuff can skip the rest if you wish.) For this photo, I wanted to show both the sunset and the course. Unfortunately, cameras have a hard time capturing that much dynamic range in one shot. If I had more time (and a tripod) I would have taken a series of photos at different shutter speeds and merged them together using Photoshop's "Merge To HDR" function, but I only had time for one photo.
So, I tried to "expose to the right" as much as possible, so that the sky was very bright (but not blown out). That way I knew I would have something of the ground to work with, at least. I shot in RAW, of course, giving me more bits to work with for each pixel. I then processed the RAW file twice: Once for the sky (basically saving it "as shot"), and once for the ground (using +2 digital exposure compensation). I saved out both versions as 16-bit TIFF files.
I ran both of them through NoiseNinja, using heavy denoising on the ground file. Then I loaded both up into Photoshop, and created a file with two layers: One for the ground, and one for the sky. I used the "Color Range" selection tool, and clicked on the sky, and cranked the "fuzziness" up to about 160. I then created a layer mask using that selection on the sky layer, giving me an image with the sky and the ground exposed roughly where I wanted them to be. I also wanted to adjust the levels of the sky, so I created an adjustment layer with a layer mask based on the sky selection, but feathered out by 50 pixels. This allowed me to adjust the levels in a way that didn't mess up the border between then sky and the ground too much. Finally, I created a saturation adjustment layer on top of the ground layer so that I could get the grass to look a little greener.
Did I overdo it? It's hard to tell. I think it looks more like what I saw. Anyway, it was good practice, both for golf, and for post processing techniques!
Technical details: This was shot with my Rebel XT + EF-S 10-22mm at 22mm, ISO 800, f/8 for 1/30th of a second.
For the record, here is the original:-- Michael at 11:52pm, Thursday June 14, 2007 ESTI actually did manage to blow out the red channel without realizing it when I took the photo. I can definitely see why colour histograms would be very useful!
Good shot Mike.  I don't think you over-did it with the PP, looks natural to
me.  There are a couple of other ways to achieve the same results (there always
are in Photoshop :)).
-- Aravind at 11:43am, Friday June 15, 2007 EST
Nice shot!  I really find it endlessly fascinating to learn how much technical
work and effort is required to simply duplicate what the human eye perceives.
-- Jenny at 12:09pm, Friday June 15, 2007 EST
That's amazing that you can make the grass show up like that, when all was
black before. I'm waiting to see some sunset photos I took on June 15th, where
my attempt to show the foreground was to take the shots over water. My PP
skills are nil.
-- Mum at 7:27am, Monday June 25, 2007 EST
Hosted by theorem.ca